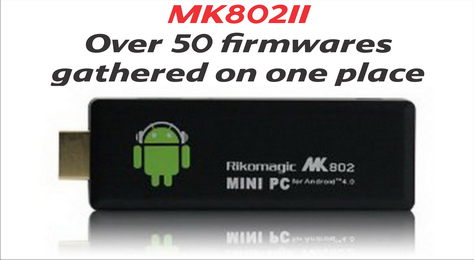
MK802II firmwares gathered on one place!

More than 50 different compatible firmwares

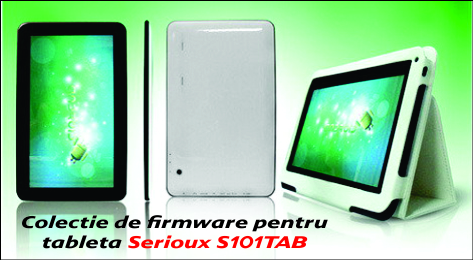
Colectie de firmware pentru tableta Serioux S101TAB

6 versiuni de firmware compatibile

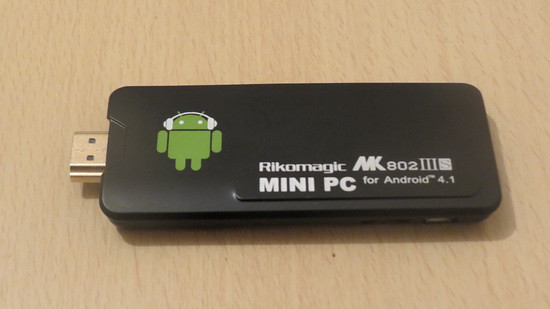
MK802IIIS with Bluetooth firmwares gathered on one place!

More than 20 different compatible firmwares

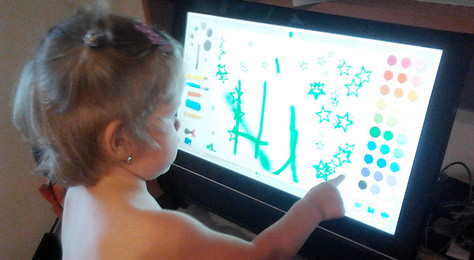
Miruna Ioana folosind un PC AIO cu Touchscreen

Miruna Ioana, fetita mea doar de 2 anisori, testand inca din prima zi ecranul noului PC AIO al familiei. Aplicatia in care deseneaza ea atat de frumos este 'Paint', a celor de la Fingertapps.

Se afișează postările cu eticheta mini PC. Afișați toate postările

vineri, 11 septembrie 2015

Cele mai mici PC-uri cu procesoare Intel au cele mai mici prețuri în perioada Back to School


Intel® Compute Stick și Intel® Next Unit of Computing sunt cele mai mici PC-uri cu tehnologie Intel, proiectate să ocupe cel mai puțin spațiu acasă
Intel salută venirea toamnei cu o ofertă specială la cele mai mici PC-uri ce integrează procesoarele companiei. Este vorba despre Intel® Compute Stick, care măsoară doar 10 cm, și Intel® Next Unit of Computing (Intel® NUC), mini PC-ul care ocupă incredibil de puțin spațiu și oferă o performanță comparabilă cu cea a unui desktop PC clasic.

Intel® Compute Stick este disponibil la Altex și eMAG la prețul de 644,99 lei. Este dotat cu procesor quad-core Intel® Atom™, 32GB capacitate de stocare, memorie RAM de 2GB și cu Windows* 8.1 preinstalat. Mini PC-ul transformă orice TV sau monitor HDMI într-un computer complet funcțional. Datorită Bluetooth 4.0, se conectează ușor la periferice precum mouse și tastatură, iar la Internet, prin Wi-Fi. Pentru Intel® Compute Stick utilizatorii pot face upgrade gratuit la Windows 10, noul sistem de operare construit pentru o interacțiune nouă cu dispozitivele și pentru experiențe personale și imersive.

O altă formă inovatoare a PC-ului este Intel® Next Unit of Computing (Intel® NUC), disponibil în mai multe variante, bazate pe procesoare Intel® Celeron®, Intel® Core™ i3, Intel® Core™ i5 sau Intel® Core™ i7. Cel mai accesibil Intel® NUC cu procesor Intel® Celeron® este la Altex, la 899,9 lei, în timp ce unul ce răspunde tuturor sarcinilor de lucru de acasă, cu procesor Intel® Core™ i5, costă 2019,99 lei la eMAG.

Intel® Compute Stick și Intel® Next Unit of Computing sunt cele mai noi forme ale PC-ului, care aduc performanța dorită de utilizator, ocupând incredibil de puțin spațiu acasă. Ambele mini PC-uri sunt create pentru a da un nou ințeles divertismentului de acasă, utilizatorul având posibilitatea de a lucra, de a crea și de a se juca de oriunde în casă.

Cele două mini PC-uri vin cu noutatea absolută în materie de computing la distanță, fără cabluri. Intel® Remote Keyboard este o aplicație creată special pentru cele două mini PC-uri Intel. Este disponibilă gratuit în App Store și Google Play. Tranformă tableta sau smartphone-ul în telecomandă, permițându-i utilizatorului să controleze PC-ul de la distanță din orice loc al casei.

Intel® Remote Keyboard se instalează rapid, în patru pași simpli. Se descarcă  aplicația pe smartphone sau tabletă, se instalează Intel® Remote Keyboard host app de pe Intel® Download Center pe Intel® Compute Stick sau Intel® NUC, se deschide aplicația pe dispozitivul mobil, se selectează computerul din lista de device-uri și se scanează codul QR de pe ecranul PC-ului.

Intel® Remote Keyboard oferă tastatură QWERTY completă, inclusiv tastele ctrl, alt, esc pentru Windows, trackpad care include click dreapta și stânga, scroll bar.

vineri, 15 mai 2015

Unboxing Voyo Mini PC. Prima rulare, primele impresii.


Astăzi avem un alt unboxing - Voyo Mini PC, un mic PC cu Windows propulsat de Z3735F, un procesor quad core Intel Atom Baytrail.


Apropo, puteți cumpăra acum Voyo Mini PC de la magazinul online www.gearbest.com cu 120.79 dolari, cu transport gratuit inclus.
 Deghizat într-un 4K media player, Voyo Mini PC este de fapt un PC complet functional cu Windows sistem 8.1, potrivit pentru navigarea pe web, verificarea conturilor de e-mail, actualizări de rețele sociale de la birou si chiar sarcini diferite. Pentru acest rol, ne putem baza pe Microsoft Office 365, care primeste un abonament gratuit 1 an si 1 TB de stocare bonus in contul One.

Nu mai mare decât o carcasă de CD, dar elegant și complet silențios, Voyo Mini PC foloseste rețeaua wireless pentru acces la internet si conexiunea HDMI pentru conectarea usoara la un TV LED/LCD sau monitor. Interfață  sistemului de operare Windows 
8.1 poate fi controlaat folosind o varietate larga de accesorii: monitor cu o interfata touch, touchpad extern, mouse și tastatură Bluetooth sau gamepad-uri USB, etc. În plus, avem 3 conectori USB 2.0 pentru atașarea de hard disk-uri externe, modemuri USB 3G pentru acces la Internet mobil, imprimante, și orice alt accesoriu pentru PC.

Voyo Mini PC vine cu o memorie interna generoasa de 64 GB, 2 GB memorie RAM DDR3 și este propulsat de un procesor
Atom Z3735 pe 22nm. Cu un consum redus de numai 2.2W, mai mic decat alt unui bec de economic pe LED, jucaria este dotata cu procesor quad-core la 1.33GHz (1,8 GHz în Turbo) și grafica este oferita Intel HD Graphics, ce ofera decodare hardware a conținutului video (inclusiv 4K) și accelerare 3D DirectX 11.


Specificatii Voyo Mini PC
– Platforma: Intel Bay Trail
– Procesor: Atom Z3735F cu patru nuclee la 1.33GHz  (1.83GHz Turbo), 64bit, 2MB L2 Cache, 2.2W TDP
– Placa grafica: Intel HD Graphics (646MHz, 4 units SP, DirectX 11)
– RAM: 2GB DDR3 1333
– Stocare: 64GB Samsung EMMC
– Conectori: 3x USB 2.0, 1x mini HDMI 1.4, 1x microUSB, headphone (3.5mm)
– Conectivitatey: WiFi N, Bluetooth 4.0
– Sistem de operare: Windows 8.1 with Bing (32 bit) activat
– Dimensiuni: 126 x 126 x 12 mm
– Greutate: doar 140 grame
– Altele: baterie interna de 1000 mAh, cititor carduri microSD pana la 128 GB, microfon intern

Ce gasesti in cutie? 
– VOYO Mini PC x 1 bucata
– Cablu de alimentare Micro USB
x 1 bucata
– Adaptor alimentare USB x 1 bucata 
– cablu HDMI x 1 bucata 
– Manual utilizare x 1 bucata
– Card de garantie x 1 bucata

Prima rulare, primele impresii. 
Dispozitivul porneste rapid, incarcand ecranul de Start pentru Windows 8.1 sub 20 secunde, ceea ce este minunat. După prima pornire, sistemul imi afisa ca 48.5GB din 53.3GB erau liberi pe stocarea internă. Și da, Windows 8.1 cu Bing este activat. Performanța dispozitivului se simte fluid si rapid, cu animații si aplicatii se lanseaza chiar rapid. WiFi-ul este de asemenea rapid și stabil, iar lipsa de port Ethernet RJ45 nu mai este in prezent o problemă, puteți cumpăra un adaptor USB ieftin.Odată depasita configurarea inițială, experiență Windows devine mai placuta iar timpul de pornire a aplicațiilor sau incarcarea de pagini web este în limite acceptabile. Cei 2GB RAM nu par a fi un obstacol serios, atâta timp cât nu folosim prea multe aplicații simultan si nu jucam jocuri foarte solicitante.În general, Voyo Mini PC este un dispozitiv foarte interesant. Si foarte portabil.
 

Windows 8.1 cu Bing 
Windows  8.1 cu Bing este versiunea gratuită a Windows 8.1. Practic nu există nicio diferență între Windows 8.1 cu Bing și Windows 8.1, doar ca in prima versiunea build-in Internet Explorer IE11 este browser-ul implicit iar Bing este motorul de cautare preinstalat. Această versiune Windows este una standard, fără restricții pentru utilizatori, care vor putea schimba motorul de căutare implicit dacă vor dori, dar producătorii PC-urilor nu pot face acest lucru. Această nouă ediție Windows are un scop precis, acela de a ajuta producătorii de echipamente, dar și de a aduce astfel utilizatorii către serviciile Microsoft, mai ales înspre Bing și OneDrive.


Aici veți găsi galerie foto completa cu unboxing-ul Voyo Mini PC & primul tur, primele impresii.
Aici aveți un tutorial frumos: Cum se instalează cu ușurință Windows 10 Pro build 10074 cu toate driverele de pe Voyo Mini PC.
Galerie Foto: Voyo Mini PC BIOS.
 
Curând in zilele urmatoare voi reveni cu mai multe articole dedicate Voyo Mini PC, așa că stai aproape. Daca ai intrebari despre acest minunat gadget, iti stau la dispozitie, foloseste rubrica de comentarii de mai jos.

A la votre!

sâmbătă, 7 martie 2015

Media streaming cu VivoPC și VivoMini


ASUS VivoPC și VivoMini au un design compact și elegant ce se potrivește perfect oriunde în sufragerie. Calculatoarele au dimensiuni reduse însă sunt deosebit de puternice dacă ne raportăm la energia consumată și spațiul ocupat. ASUS VivoPC și VivoMini pot deveni adevărate centre multumedia care vin în completarea echipamentelor TV existente. 

Mai mult, cu ajutorul aplicațiilor Media Streamer și ASUS Wi-Fi GO puteți comanda de la distanță calculatoarele și puteți rula conținutul audio/video direct pe ecranul televizorului. Wi-Fi GO! include toate acele funcții cu ajutorul cărora puteți pune la punct o adevărată rețea multimedia. Cloud GO! combină conturi de stocare în cloud precum ASUS WebStorage, Dropbox, Microsoft OneDrive, Google Drive și SkyDrive, permițând chiar și salvarea simultană a datelor. Remote Desktop oferă acces și control la calculator, oriunde și în orice loc. File Transfer sincronizează fișierele între calculator și dispozitivele mobile printr-un singur click iar Remote Keyboard & Mouse le permite utilizatorilor să controleze redarea fișierelor multimedia direct din canapea.

În clipul de mai jos puteți urmări modul în care aplicațiile ASUS pun în valoare calculatoarele compacte VivoPC și VivoMini:

sâmbătă, 28 februarie 2015

Cum să schimbați memoria RAM și memoria SSD a unui VivoPC?


Înlocuirea modulelor RAM și a SSD-ului dintr-un calculator ASUS VivoMini este mai simplă decât pare la prima vedere. Operațiunea poate fi dusă la bun sfârșit și de un utilizator mai puțin familiarizat cu tehnologia.

Pasul 1. Identificați cele patru șuruburi ce fizează carcasa PC-ului. Îndepărtați capacele de cauciuc ce ascund suruburile. Rețineți poziția fiecărui capac pentru a-l monta la loc. (vezi video)  
Pasul 2. Desfaceți pe rând șuruburile cu ajutorul unei surubelnițe.
Pasul 3. Identificați sloturile pentru SSD, modulul wireless și memorie.  
Pasul 4. Introduceți modului wireless în slotul dedicat și montați antena. Fizați modulul wireless cu șuruburi.
Pasul 5. Introduceți modulul mSATA SSD în slotul dedicat, aflat deasupra modului wireless. Fixați modulul mSATA SSD cu ajutorul șuruburilor.  
Pasul 6. Inserați modulele de memorie RAM. Acestea sunt fixate cu cleme și nu au nevoie de șuruburi.  
Pasul 7. Fixați carcasa cu ajutorul șuruburilor și poziționați la loc capacele de cauciuc.  
Pasul 8. Fixați mini PC-ul cu șuruburi pe prinderea VESA aflată în spatele monitorului.

În cazul în care nu aveți destul încredere să demarați singuri această operațiune de upgrade urmăriți clipul de mai jos.

miercuri, 4 decembrie 2013

Ugoos UT1 Stock firmware 20131114 download


You can download Ugoos UT1 4.2 Stock firmware 20131114 from here, here and here. The archive has 290 MB and it contains rk31sdk-eng 4.2.2_ut1.20131114.img file. To upgrade you have to use Rockchip Batch Tool v1.7There is no changelog from previous version from 31jul2013.
It should be compatible with devices with chipset combination CPU/Wifi = RK3188/RT8188, like first generation of RKM MK802IV.

Enjoy this new release!

miercuri, 20 noiembrie 2013

Official Jelly Bean 4.2.2 firmware 20131107 installed on Rikomagic MK802IIIS BT


This is the official 4.2.2 firmware 20131107 released by Rikomagic for our stick. First, you have to download the firmware image from here, here or from here. Then follow this tutorial to flash the firmware image with Rockchip Batch Tool v1.7.

Build details: 
- Android 4.2.2 - Jelly bean
- Kernel 3.0.36+
- Languages: all

- gapps are preinstalled - the firmware is rooted, just need to install SuperSu or Superuser from Play Store to have root acces.
- Wifi & Bluetooth working just fine
- Video playback and video streaming seems ok 

Fixlist
1.Fixed some flymouses and keyboards plugged in, prompts the "Format" problem.
2.Fixed some audio bugs.
3.Fixed QQ,Skype video stutter problem.
4.Removed force horizontal screen display mode,added rotation button in status bar and switch on/off
option in settings of screen.
5.Optimized online streaming video playback.
6.Optimized blu-ray video playback.
8.Fixed 1080p UI display problems.But note:there might be some third party application layout problems.
9.Added mobile control QR Code on the main screen.


Enjoy this new find, share is love!

vineri, 15 noiembrie 2013

Rikomagic Official firmware 20131111 installed on RKM MK802IV Stick


This is the official 20131111 firmware released by Rikomagic for its MK802IV Quad Core TV Stick (RTL8188 version). It can be downloaded from here, here or here. To upgrade the MK802IV you have to use Rockchip Batch Tool v1.7.  

Build details:
- Android Jelly Bean 4.2.2
- Versiune nucleu:  3.0.36+
- Build number: RKM MK802IV-eng 4.2.2 JDQ39 eng.ant.201311.185021 test-keys
- real 1080p video output

- root acces
- gapps preinstalled


Fixlist
1.Fixed some flymouses and keyboards plugged in, prompts the "Format" problem.
2.Fixed some audio bugs.
3.Fixed QQ,Skype video stutter problem.
4.Removed force horizontal screen display mode,added rotation button in status bar and switch on/off
option in settings of screen.
5.Optimized online streaming video playback.
6.Optimized blu-ray video playback.
8.Fixed 1080p UI display problems.But note:there might be some third party application layout problems.
9.Added mobile control QR Code on the main screen.


Always keep in mind that this is not a review, just a first sight of this firmware. You have to test it more for another details, to see if it satisfies your needs.

marți, 12 noiembrie 2013

Official Rikomagic 20131019 firmware installed on MK802II

Firmware Version: Android ICS 4.0.4   
Release date: 19.10.2013
Build number: RKM-emg4.0.4IMM76D 20131019
In this episode I'll show you another firmware, this time we're talking about the official Rikomagic 20131019 firmware installed on Rikomagic MK802II Stick. The method is the same, burn the firmware with PhoenixCard Tool on your micro SD card, insert it in your MK802II stick, power on and wait 4-5 minute. In fact, you can learn from this video tutorial how to do it exactly.

Download the oficial Rikomagic 20131019 firmware from herehere or from here. I guess that this version has also root access, like always, just install and run SuperSu or Super User from Play Store.

 
Oficial Rikomagic 20131019 firmware Changelog
1.Support Miracast
2. Support Device name under FireAir and Google tv remote can be changed by user
3. Improved network streaming performace
4. Improved 3D and blu-ray decoding performace


Always keep in mind that this is not a review, just a first sight of this firmware. You have to test it more for another details, to see if it satisfies your needs.

joi, 24 octombrie 2013

Tronsmart CX919 Jelly Bean 4.2.2 1080 firmware


Tronsmart CX-919 Specification
- OS: Android Jelly Bean
4.2.2
- RAM: 2GB DDR3; ROM: 8GB Nand Flash
- CPU: Rockchip RK3188 Qual Core CPU; GPU: Quad Core Mali 400
- Wifi: IEEE 802.11 b/g/n; Wifi chipset RK903; bluetooth: Bluetooth 4.0 Module
- I/0 Port: USB2.0 host X 1; OTG micro USB X 1; Power micro USB X 1; HDMI 1.4 OUTPUT X 1; Micro SD card slot


You can download Jelly Bean 4.2.2 1080 firmware (CX919-RK3188-4.2-1080P.img) from here, here or here.


marți, 8 octombrie 2013

Ugoos UT1 4.2.2 official firmware installed on RKM MK802IV Stick


This is an official 4.2.2 firmware released by Ugoos fot its model UT1. First, you have to download the firmware image from here or here. You can install it, with some limitations, on RKM MK802IV Stick (RTL8188 version), following this tutorial to flash it with Rockchip Batch Tool v1.7.


Build details: 
- Android Jelly Bean 4.2.2;
- Kerne version: 3.0.36+
- Antutu Benchmark score: 18.124 point;
- gapps preinstalled;
- a lot of TV online streaming apps preinstalled; 
- Wifi & Ethernet working just fine
- Bluetooth not working (different chip I guess);
- Video playback and video streaming seems very ok. 

- new launcher; 
- not rooted.


Enjoy this new find, share is love!

Always keep in mind that this is not a review, just a first sight of this firmware. You have to test it more for another details, to see if it satisfies your needs.

luni, 7 octombrie 2013

Ugoos UT1 Riley/Finless ROM v1.0a installed on RKM MK802IV Stick


This is a custom 4.2.2 firmware made by Riley for Ugoos UT1 model. First, you have to download the firmware image from here, here or from here.You can install it, with some limitations, on RKM MK802IV Stick (RTL8188 version).


Build details: 
- Rooted (with latest Superuser)  
- 4gb user app space  
- init.d support
- Google Play Store fixes  
- Location Services enabled
- Gameloft Game fix added  
- Debloated
- Your choice of 720p or 1080p resolution (depending on which kernel you decide to flash)  
- Reboot app by Petrus  
- Bootanimation by Tattman65  
- Flash Tool by Finless  
- Your choice of Launchers  
- First Time User's Guide by Pr0xZen

Tested:
- very fast and stable;
- Wifi & Ethernet working just fine
- Bluetooth not working;
- Video playback and video streaming seems very ok. 
- USB audio doesn't work.


Enjoy this new find, share is love!

Always keep in mind that this is not a review, just a first sight of this firmware. You have to test it more for another details, to see if it satisfies your needs.

duminică, 6 octombrie 2013

UG007II 4.2.2 Official firmware installed on Rikomagic MK802IIIS BT


This is the official 4.2.2 firmware released by Ugoos on 20 august 2013 for its stick UG007II with MTK Wifi chip. First, you have to download the firmware image from here, here or from here. Then follow this tutorial to flash the firmware image with Rockchip Batch Tool v1.7.


Build details: 
- Android 4.2.2 - Jelly bean
- Kernel 3.0.36+
- Languages: all

- gapps are preinstalled  
- the firmware is not rooted.
- Wifi & Ethernet working just fine
- Bluetooth not working;
- Video playback and video streaming seems ok
- Build number: rk30sdk-eng 4.2.2 JDQ39 eng.zs.20130820.112013 test-keys
- Vendor software version: RK3066_R-BOX_ANDROID4.2.2-SDK_V1.0.0_130308


Enjoy this new find, share is love!

Always keep in mind that this is not a review, just a first sight of this firmware. You have to test it more for another details, to see if it satisfies your needs.

duminică, 29 septembrie 2013

Digma IDS10 A41 v2.0.8 27092013 firmware installed on Rikomagic MK802II Stick


Firmware Version: Android JB 4.1.2
Release date: 27.09.2013
Build number: JB.DIGMA_IDS10.20130927


In this chapter we've got another JB firmware for our MK802II Stick: today we are talking about Digma IDS10 A41 v2.0.4 23082013 firmware, you can download it from here or here.

The method is the same, burn the firmware with PhoenixCard Tool on your micro SD card, insert it in your MK802II stick, power on and wait 4-5 minute. In fact, you can learn from this video tutorial how to do it exactly. First boot takes longer, you have to wait about 5 minutes, so please be patient.


Build details:
- Android
Jelly Bean 4.1.2
- Baseband v3.0
- latest Kernel 3.0.97
- Languages: English, Russian, Chinese 

- not rooted.

Enjoy this new find, share is love! 


Always keep in mind that this is not a review, just a first sight of this firmware. You have to test it more for another details, to see if it satisfies your needs.

miercuri, 25 septembrie 2013

Official Jelly Bean 4.2.2 1080 firmware 20130902 v1.0 installed on Rikomagic MK802IIIS BT


This is the official 4.2.2 1080 firmware 20130902 v1.0 released by Rikomagic for our stick. First, you have to download the firmware image from here, here or from here. Then follow this tutorial to flash the firmware image with Rockchip Batch Tool v1.7.

Build details: 
- Android 4.2.2 - Jelly bean
- Kernel 3.0.36+
- Languages: all
- 5.1 sound output
- gapps are preinstalled - the firmware is rooted, just need to install SuperSu or Superuser from Play Store to have root acces.
- Wifi & Bluetooth working just fine
- Video playback and video streaming seems ok
- Build number: MK802IIIS-eng 4.2.2 JDQ39 eng.zs.20130902.092453 test-keys
- Vendor software version: Rikomagic MK802IIIS_R-BOX_ANDROID4.2.2-SDK_V1.0.0 

There are a lot of users complaining about this version released by Rikomagic; till now seems to run just fine for me, but in the same like it looks like an intermediary version yet.


Enjoy this new find, share is love!

Always keep in mind that this is not a review, just a first sight of this firmware. You have to test it more for another details, to see if it satisfies your needs.

duminică, 22 septembrie 2013

NeoTV Crom 1.5 Jelly Bean 4.2.2 firmware installed on RKM MK802IV Stick


This is the newest NeoTV Crom 1.5 Jelly Bean 4.2.2 firmware for MK802IV Quad Core TV Stick (RTL8188 version). It can be downloaded from here or here. To upgrade the MK802IV you have to use Rockchip Batch Tool v1.7.  

Build details:
- based on the New Firmware from RKM with Android 4.2.2.
- Init.d Support
- YouTube, GMail, Lightning Web Browser with Flash Support, Super User, Open Explorer PlayStore & Reboot App

- Bluetooth, Wifi, USB Cam - all working just fine.


Tested
- Ethernet --> OK (I use an USB 2.0 to Ethernet RJ45 Female Network LAN Adapter)
- Rikomagic MK702 fly mouse --> OK
- Skype / camera --> OK


Always keep in mind that this is not a review, just a first sight of this firmware. You have to test it more for another details, to see if it satisfies your needs.

marți, 17 septembrie 2013

Rikomagic MK602 Dual Core Magic TV Box firmware


This is the official firmware Jelly Bean 4.2.2 130729 version released by Rikomagic for its MK602 Dual Core Magic TV Box. It can be downloaded from here or here. To upgrade the MK602 you have to use Rockchip Batch Tool v1.7.  


1. Prepare an USB cable(USB port to USB port), insert the one port to computer USB host.
2. Prepare a thin metal stick, press the recover button by the stick according above image.
3. Don’t loose the stick, at same time, insert another usb port to the tv box USB port, after 3-5s,loose the stick. 
4. Install the driver (you'll find it in the firmware archive).
5. Run Rockchip Batch Tool v1.7. and flash the firmware. This procedure will cost about 3 minutes also, so please wait patiently, during recovery/upgrade don’t remove the USB cable. When a prompt window appears, that means recovery is successful, pull out USB cable, then total process is finished. 
6. Enjoy your new firmware! ;)

[Update] Download new stock firmware 140401 for RKM MK602 TV Box from here.


See the below guide for details


sâmbătă, 14 septembrie 2013

Rikomagic Official 1080p firmware 8188 20130905 installed on RKM MK802IV Stick


This is the official 1080p 20130905 firmware released by Rikomagic for its MK802IV Quad Core TV Stick (RTL8188 version). It can be downloaded from here or here. To upgrade the MK802IV you have to use Rockchip Batch Tool v1.7.  

Build details:
- Android Jelly Bean 4.2.2
- Versiune nucleu:  3.0.36+
- Build number: RKM MK802IV-eng 4.2.2 JDQ39 eng.ant.20130905.185021 test-keys
- real 1080p video output

- root acces
- gapps preinstalled


Tested
- Ethernet --> OK (I use an USB 2.0 to Ethernet RJ45 Female Network LAN Adapter)
- Rikomagic MK702 fly mouse --> OK
- Skype / camera --> OK

- good and stable wifi signal   


Always keep in mind that this is not a review, just a first sight of this firmware. You have to test it more for another details, to see if it satisfies your needs.

duminică, 1 septembrie 2013

NeoTV Crom v1.3 installed on RKM MK802IV Realtek 8188eus version


This is a custom firmware released for RKM MK802IV Quad Core TV Stick (RTL8188 version). It can be downloaded from here or here. To upgrade the MK802IV you have to use RKDevelopTool_v1.37 within the archive.  


Build details:
- Android Jelly Bean 4.2.2
- Versiune nucleu:  3.0.36+
- Build number: RKM MK802IV-4.2.2 NEOTV CROM 1.3 OG
- Rooted
- 720p Custom Kernel
- Gameloft Fix
- Init.d Support
- Tweaks for Speed and Stability

Apps that´s Included:
- New Android Play Store
- New YouTube App
- SuperUser
- BlackScreen Screen Saver
- Reboot App
- BlueZ Ime for Bluetoot Controller

- Chrome
- Play Music


This is my favourite firmware till now because everything I need works just fine:

- Ethernet (I use an USB 2.0 to Ethernet RJ45 Female Network LAN Adapter)
- Rikomagic MK702 fly mouse;
- Skype / camera

 
Always keep in mind that this is not a review, just a first sight of this firmware. You have to test it more for another details, to see if it satisfies your needs.

miercuri, 28 august 2013

Carbon Unofficial 20130619 907 JB 4.2.2 firmware installed on Rikomagic MK802II Stick

Firmware Version: Android Jelly Bean 4.2.2       
Release date: 19.06.2013 
Build number: carbon_907-userdebug 4.2.2 JDQ39E eng.gbox.20130619.101042 test-keys


Installation steps 
First of all, you  must have a stock firmware on your MK802II device (MK802II1031 or MK802II1205
Download Win32 Disk Imager from here, and then download the CM10 All in One installer image from here or from here

Extract both zips to an appropriate location and open Win32 Disk Imager within its folder. In the top right corner of the application, select your SD card's drive letter (do not mess this up or you will erase one of your other drives).
Select the CM10 image (it should have an img extension, not zip) and hit the write button. Let the process run through, and once it is complete, safely eject the SD card once more.  

After this step take a look of your SD card content in 'My Computer'.
Download Carbon Unofficial 20130619 907 JB 4.2.2 firmware from here or from here, copy it on your SD card instead of the original archive CM10 All in One package and go to the next step.

Insert the card into your (turned off) MK802II and power it up. You should be greeted with the CWM recovery menu.
Standard Keymap for this CWM is up arrow = up, down arrow = down, enter = select, esc = back

 
DO NOT USE THE STANDARD DATA WIPE/FACTORY RESET OPTION, IT WILL ERASE THE SD CARD. If you do, start over from the beginning of this section.
Go into the mounts and storage menu, and wipe your cache, data, and system. Go back and enter the advanced menu, and wipe your Dalvik Cache.


Return to the main CWM menu and select "Install zip from SD card" followed by "choose zip" and then install the CARBON-JB-UNOFFICIAL-20130619-1010-907.zip file
. Once that completes, return to the zip selection menu and install the gapps package or you can download, put on your SD card and install the newest pack gapps-jb-20130301-signed .zip.
 
Now return to the main menu and remove your SD card, then reboot. The card CANNOT be in the slot or CM10.1 will not boot. If things seem to be hanging at a black screen, power off the device and turn it back on (always without the SD card).


Enjoy the sight of the boot up logo and give it some time to start. A lot of processes are running during your first boot, so give your system time to settle in. If the device appears to hang (even for 5-10 minutes) during this first use, wait for it to respond, it almost always comes back to life or try to restart it after a waiting time.


Working:
Camera (but videorecord not work)
Sound,
Microphone
Wifi
storages
PC conection 

G-sensor
USB-OTG
Bluetooth usb (only CSR)

Not working:
no CedarX support
no HW accelerating decoding/encoding


Enjoy this new firmware!


Always keep in mind that this is not a review, just a first sight of this firmware. You have to test it more for another details, to see if it satisfies your needs.